The F-Stops Here
(Let’s start at the beginning!)
by Steve Kozak
M. Photog., CR.
CPP
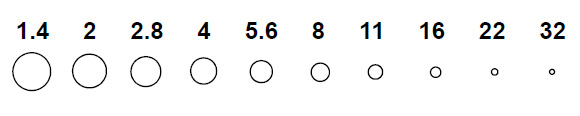
The F-stop, or “aperture” is the control in the lens that “opens up” or “stops down” the diaphragm inside the lens as a way to control the amount of light that reaches the film or sensor. The whole f-stops are:
![]() The f-stops on your lenses may not be numbered exactly the same as these, but they will be close. These are considered to be “whole stops”. There may also be “half stops” and “1/3 stops” between each of these. F-stops are a unit of measure that refer to the size of the lens opening. They also continue on past F32.
The f-stops on your lenses may not be numbered exactly the same as these, but they will be close. These are considered to be “whole stops”. There may also be “half stops” and “1/3 stops” between each of these. F-stops are a unit of measure that refer to the size of the lens opening. They also continue on past F32.
As you prepare your studies to take the CPP exam, you would make things much easier on yourself if you would commit the listed f-stops above, in order, to memory! Memorize them forward and backwards. Memorize the numbers as listed above rather than those on your lens. We will learn to interpret the numbers on your lenses, later.
FIRST THINGS FIRST
In case you have never actually used your camera in manual mode, take a few moments to get acquainted with your camera.
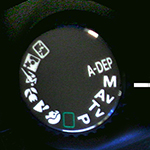 First, set your camera dial to Manual Mode (M).
Next, you are going to need to figure out how to set these four items: Shutter speeds, f-stops, ISO and White Balance.
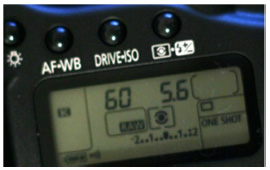 On the display at right, “60” is the selected shutter speed and “5.6” is the selected f-stop.
On most cameras, there is a dial very near the shutter button that will change the shutter speed. This same dial may also change the f-stop when used in conjunction with pressing another button which activates the f-stop selection.
 This button may be located on the back of the camera or even on the front of the camera near the lens. It may be marked with a symbol that looks like this:
Check the instruction manual for your camera to determine how to change the f-stops and shutter speeds.
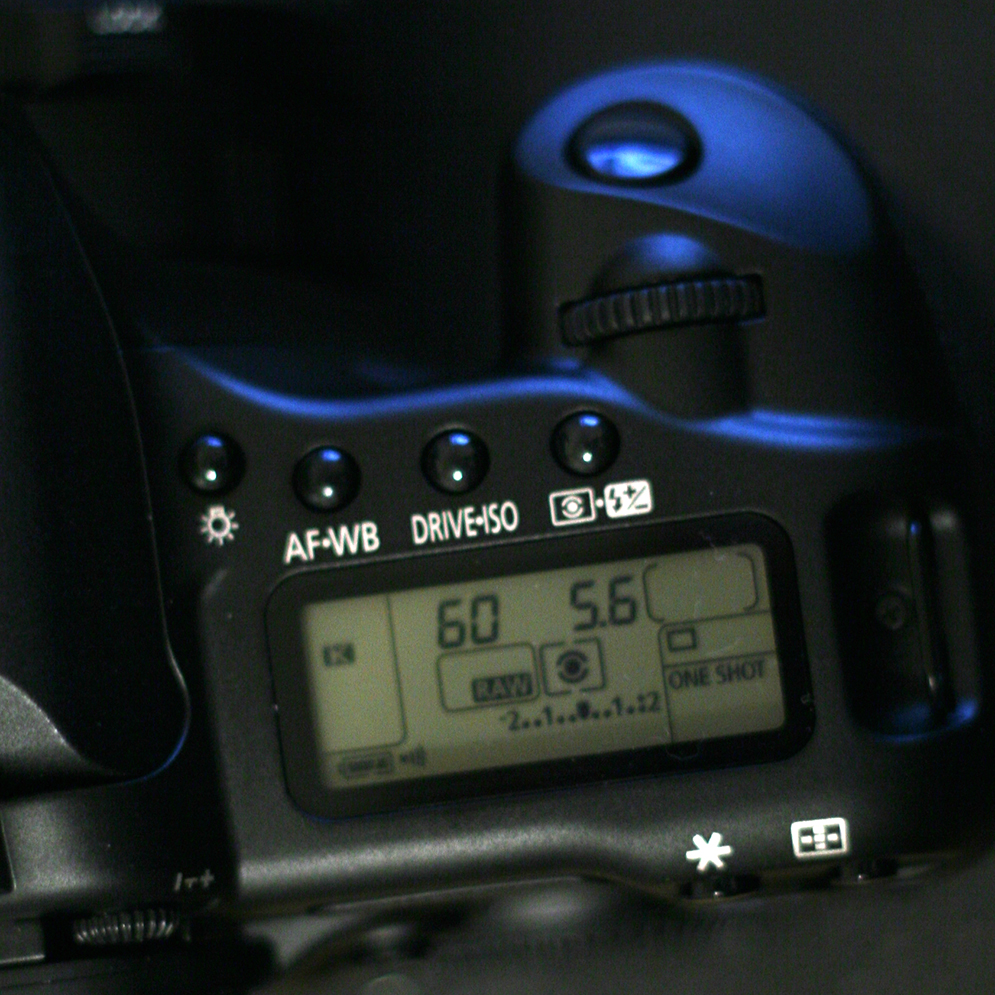 In the image at left, you will also see the buttons that set the White Balance (WB) and the ISO. Again, pressing the WB button while moving the dial near the shutter will change the white balance settings and pressing the ISO button while moving the dial will change the ISO. Again, refer to the instruction book for your camera to figure out how to changes these settings.
White Balance
This control on the camera is used to correct the color casts that come with photographing in various types of lighting conditions. This control uses a series of several icons to represent various lighting sources and the photographer can simply choose the icon that matches the light source being used.
 There are also “custom” white balance options which can be used in tandem with other tools to set the white balance of a given scene.
Some cameras also offer a “K”, or “Kelvin” setting that allows the photographer to be even more selective in how the white balance is controlled. Use of the “K” setting requires the photographer to access the menu to manually choose the Kelvin temperature setting desired.
For now, we are only concerned with matching up the icon for the appropriate lighting conditions. For example, if you are photographing with the sun, use the sun icon. If you are indoors with traditional tungsten light bulbs, use the light bulb setting.
If your camera has the “K” option, learn how to access the Kelvin settings in your menu and try to get comfortable with locating it and making adjustments, with ease.
ISO Numbers (International Organization for Standardization)
The ISO number is a way of rating a film’s or sensor’s sensitivity to light.
The higher the ISO number, the more light sensitive it is.
The smaller the ISO number, the less light sensitive it is.
In other words:
The higher ISO’s such as 400 and 800, are quite light-sensitive and are capable of recording in low-light situations such as indoors with no flash or even outside at night.
The lower ISO’s such as 100 and 200 require more light, so they are used outside during daylight or indoors with a flash. We will work a bit more with ISO’s later on.
Find Your Way Around Your Camera
Now that we have looked at ISOs, White Balance Icons, F-stops and Shutter Speeds, let’s see if you have everything under control. Please practice setting up your camera up in Manual Mode as follows:
A. ISO 100, F11 @ 125, White Balance set to “cloudy”
B. ISO 400, F5.6 @ 500, White Balance set to “sunny”
C. ISO 1600, F16 @ 30, White Balance set to “fluorescent”
D. ISO 200, F8 @ 250, White Balance set to “shade”
E. ISO 800, F22 @ 60, White Balance set to “tungsten”
F. ISO 100, F5.6 @ 1000, White Balance set to “flash”
G. ISO 400, F11 @ 15, White Balance set to “cloudy”
H. ISO 100, F5.6 @ 125, White Balance set to “sunny”
ONE MORE THING
Many DSLR’s allow you to make a custom change to your camera to control the way you scroll through the f-stops and shutter speeds. Most cameras come “out of the box” set up with the f-stops in 1/3 stop increments. Frankly, because we are moving over to becoming “Manual” photographers, I would prefer that you set your camera up in ½ stop increments. This can be done at the menu level in the “Custom Functions” settings.
Canon cameras usually refer to this setting as “Exposure Level Increments” while Nikon may refer to it as “EV Steps”. For other camera brands, refer to your manual.
I encourage you to get a note pad that you can keep handy and do the following exercises:
- With your camera set to 1/3 stops, write down all of the f-stops that your camera shows between F4 and F22.
F4 ____ ____ 5.6 ____ ____ 8 ____ ____ 11 ____ ____ 16 ____ ____ 22
Now, write down all of the ISO Settings between 100 and 3200.
100 ___ ___ 200 ____ ____ 400____ ____ 800 ____ ____ 1600 ____ ____ 3200
2. Now, go into your menu and change your camera from 1/3 to ½. This will eliminate some of the “clutter” on your dial and make it easier for you to dial through the f-stops and shutter speeds. I think this is a VERY HELPFUL option if your camera allows this. Don’t be sad if you camera does not allow this.
Now, write down the new stops between F4 and F22.
F4 ____ 5.6 ____ 8 ____ 11 ______ 16 _____ 22
Now, write down all of the ISO Settings between 100 and 3200.
100 ____ 200 _____ 400_____ 800 _____ 1600 _____ 3200
You do not really have to memorize these “1/3” and “1/2” stops…just know that they exist.
NOW COMES THE TRICKY PART ABOUT F-STOPS!
The smaller the F number, the larger the lens opening.
The larger the F number, the smaller the lens opening.
A large lens opening such as F4 will let more light reach the sensor than a small lens opening such as F22. As a matter of fact, there is a relationship between each of the f-stops:
Any time you move your lens from one f-stop to the next smaller f-stop, the amount of light that reaches the film DOUBLES.
EXAMPLE:
F5.6 lets in twice as much light as F8.
F4 lets in twice as much light as F5.6.
This pattern is the same throughout the f-stops.
To look at this on the other hand:
Moving the lens from F5.6 to F8, cuts the light reaching the sensor, in half!
Moving the lens from F4 to F5.6 cuts the light reaching the sensor in half!
And this pattern continues.